Archive | Uncategorized RSS feed for this section

Pumpkin Pie Bites

26 Sep

* Update – I made these hand pies again and used a 2 1/2 inch diameter glass to make them a little smaller.  This allowed me to get a dozen from 1 recipe of dough and the serving is a little smaller (which means less calories!).

Fall has me feeling like pie (shock, so did spring and summer).  My son Elliot has been reminding me all weekend that it is officially Fall and wondering when we can have our first pumpkin pie.  I have this weird issue about having pumpkin pie before Thanksgiving.  It’s my absolute favorite pie, but I just can’t bring myself to make one if there isn’t turkey on the table.  I’m all over anything else that has pumpkin in it – lattes, cookies, bread, pasta – the seasonal eater in me is at her best in the Fall.

With pumpkin in the air and pie on my mind, what’s a girl to do?  It’s time to go back to pie-that-isn’t-pie… pumpkin style!

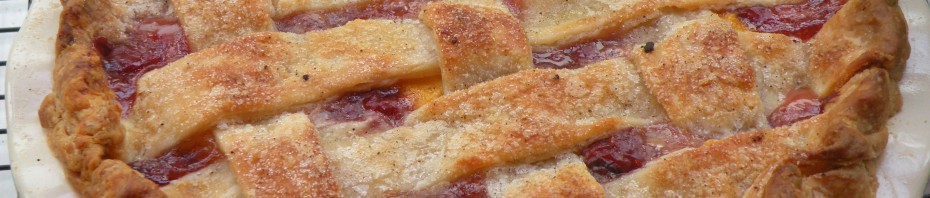
Hand pies – practice makes perfect

When I first started this quest a couple of months ago, I dove right into perfecting the hand pie.  They’re such a throw back and with a vanilla glaze, are reminiscent of the Hostess pies I used to eat as a kid.  That is, if you make them right.  After eleven – yep – ELEVEN attempts, I finally nailed it tonight on my twelfth attempt at perfect hand pies.  Here are my lessons learned from the many failed attempts:

All butter isn’t all it’s cracked up to be

I so want to be a believer of all butter crust, but it just has not worked for me with hand pies.  Every time I tried, my dainty little pies ended up cooking in a pool of butter on parchment paper.  The result was a chewy, inedible crust and a total waste of good filling.  So I went out and bought a store bought crust just to see what would happen.  Do you know what happened?  The most beautiful little hand pies, all crisp, brown and flaky.  Why, you ask?  All LARD.  LARD – the homecoming queen of pie crust.  So, I experimented and found that if I increased the shortening, my crust was much better.

Cold, cold and colder

These hand pies are not for the faint of heart or short on time.  They take a serious commitment and some preparation.  To make a hand pie, take the dough out of the fridge and roll it as if you were rolling a pie and just as thin.  Using a round cookie cutter (anywhere from 3 to 5 inches in diameter depending on the finished size you want), cut circles and gently place them onto a baking sheet lined with parchment paper.  If you have scraps and need to re-roll them to get more circles, wrap them back up into a disc, cover with plastic wrap in chill in in the fridge for 10 minutes.  Once you have cut all of your circles, place them back in the fridge while you make your filling.  Once your filling is ready, take the circles out of the fridge and fill your hand pie (instructions to come).  Once the pies are sealed and filled, put them back in the fridge (or freezer) for 10-15 minutes.  Then, you’re ready to bake them.  If you didn’t notice, there’s a lot of fridge time!  It’s totally worth it.

Filling is key

I made a mistake early on by making pie filling and putting it uncooked into the hand pies as I would a regular pie.  This resulted in an inside crust that seemed under baked.  I realized that you need to fully cook your fillings and then bring them to room temperature before filling a hand pie.  Once I began to precook my fillings, the pies baked so much better!

Continue reading

Apple Crumb Pie

15 Sep

Enough about all of the books, blogs and articles that espouse how to make great pie.  It’s time to put my hands in the bowl and get dirty.

Over the past month or so, I’ve made ten attempts at various incarnations of a pie crust (attempt number eleven is in the fridge as I type).  I’ve landed on a pie crust recipe that is a hybrid of a few that I’ve had success with.  There’s not much creativity in tweaking a pie crust recipe, but this one seems to have the right shortening to butter ratio for my taste.

Best of Both Worlds Pie Dough

For a 9-inch single crust

1 1/2 cups all purpose flour (Cold!)

1 Tablespoon sugar

1 tsp salt

4 Tablespoons (a little more than 1/3 cup) shortening (I like Spectrum palm oil shortening) (Cold!)

8 Tablespoons unsalted butter (Cold!)

* cut both of these into tablespoon-sized pieces

Just under 1/4 cup ice water

1 1/2 teaspoons cider vinegar (just add to the water)

Put the flour, salt and sugar into a food processor with a metal blade; pulse just to combine the ingredients.  Drop in the butter and shortening.  Pulse only until they are cut into the flour – don’t over process.  It will look like some are the size of peas and some pieces might be larger.  Gradually begin to add the water through the chute pulsing each time.  Add about a tablespoon at a time. Watch carefully – you want to stop as soon as the dough can be pinched together.  This will happen in the blink of an eye.  The dough will not form in the processor like you would expect cookie dough to.  It might even still look a little crumbly.  If you can pinch it, turn it out onto saran wrap and form it gently into a ball.  Wrap the dough, flatten into a disk and refrigerate for at least an hour.

In future attempts, I’m going to try a vodka twist and one that includes an egg just to spice things up.

It was all about apple pie this weekend.  I mean, you can’t be a pie maker (or an American so I hear) if you can’t make an apple pie.  Continue reading

Pie School 102 – the ingredients

11 Sep

4.  Maybe 5.  That’s it.  That’s the number of ingredients that you need to make a pie crust.  And they are all ingredients that you probably have in your house right now.  Compared to the ingredients needed to make a cake, pie crust should be, well, a piece of cake!

I had always heard that making pie crust was a big deal.  It was so scary, so temperamental.  It took some special gene that you were born with.  I honestly thought I could jump in and get it right after a few tries.  WRONG.  My crusts have been edible, but not up to the standards of amazing pie.  I feel like my kitchen has turned into a science fair project.

While I can’t say I’ve perfected crust yet (just you wait, I will!), I have nailed down the ingredient tricks of the trade.  So, for those like me and mining for tips, here’s what I have gleaned so far.

Cold, cold and colder

I hear you – keep the ingredients COLD!  Goodness.  Every person, every book, every website is a broken record.  The colder the better.  So, I am now keeping my butter, shortening and flour in the freezer.  To help make cutting in the fat easier, I slice my butter and shortening along the tablespoon lines while still in the wrapper before I freeze it.  Then, I put them in freezer bags and can break off however many tablespoons I need.

The type of ingredients matter

Butter – make sure it’s unsalted and don’t cheap out!  Some generic brands do not cook well.  Word has it that Land O’ Lakes is a good brand.  I’ve been buying Trader Joe’s and it seems good.  Butter in a crust gives it flavor and tenderness, but an all butter crust will tend to not be as flaky.

Crisco – by all means, buy the sticks not the tub! 

The sticks make it so easy to cut the right amount of shortening.  Shortening is the key to flakiness but not flavor.  I was struggling with an all butter crust, and once I added shortening to the mix, everything changed and the texture was spot on.  I am now a convert – though I think there’s room for both butter and shortening.

Lard – I haven’t gone there yet.  I hear it’s not so easy to find quality lard these days, but I have not tried.  What I do hear is that Lard will hands down give you the flakiest crust in town.  After all, that’s what grandma used.  And that store bought dough?  All lard.  I bought one, baked it and read the ingredients.

Flour – Call me naive, but I thought all purpose flour was all the same.  Nope.  Apparently, BLEACHED all purpose flour is key to pie crust.  I’ve been using unbleached all along.  Whoops.  That might explain my problems.  I have a pie crust sitting in the fridge right now that was made with bleached and am keeping my fingers crossed for a step in the right direction!

Throw in some salt, sugar and ice water and you have yourself a pie crust!  Time to get baking.  Next up will be a recipe for crust and a report back on this weekend’s pie experiment!

Pie School 101 – The Gear

10 Sep

In July, I decided to up my game and start making new pie recipes once a week.  Practice makes perfect is what I hear.  And most people will say that it takes years of practice to become a master pie maker.  So, I’m going to condense years of practice into an intensive fall/winter pie school and come out next spring with a strawberry rhubarb pie that will knock your socks off!

Like any good student, I’ve started studying everything I can get my hands on about pie.  Blogs, websites, books, articles… you name it, I’ve probably uncovered it.

My textbooks

From Julia to Dorie to a 1940’s Good Housekeeping cookbook, I’m trying to learn the basics as well as take note of any interesting techniques or tips.  For instance, the Good Housekeeping cookbook is the only one that had a great tip for how to not over mix the crust – push the dough that is ready to the side of the bowl with a fork while you continue to sprinkle water on the dry parts.  That way you don’t end up with too much water in your dough.

Here is what I have learned so far about gear (I’m still reading!)

Get the right tools

Like any good baker, you need to have the proper tools to make good pie.  It seems that the top two methods for mixing crust are a pastry blender and a food processor.  You also need to invest in a good rolling pin (I have yet to spring for the $30 that this costs).  Here’s a link to a good article about pie gear:

http://www.goodhousekeeping.com/product-testing-old/reviews-tests-old/kitchen-cooking-old/pie-making-tools-pastry-blenders

I purchased the OXO pastry blender mentioned in this article at Sur La Table.  I dragged my family to 6 stores before I finally found one at Sur La Table!!!  Don’t pay more than $12 for one – there are some out there for $20, but that’s not necessary.

You will also need a bowl that’s big enough to get both of your hands into.  A deep but narrow bowl is a flour disaster waiting to happen.

The pan is where it’s at

Unlike the rolling pin, the most revered pie pan is the 9″ glass Pyrex pan.  It’s only around $7 if that!  A 9″ pan is the most basic pie size and will accommodate most recipes.

If you are making a pie that has a double crust and lots of fruit, then you will want to consider a 9.5″ deep dish pan.  Pyrex also sells a great set of 2.  If you want the holy grail of pie pans, then spring for an Emile Henry enamel pie plate.  They are beautiful and most reviews give their ability to brown a bottom crust a big thumbs up.  You can get them at Williams Sonoma and Sur La Table and I’m sure other places.  But, that’s easy for me to say because by sheer luck, I happen to have one that I picked up for $5 five years ago at a garage sale!  Yet another sign that I was meant to make pie.

Pie gearOther important supplies

Before you dive in with me, be sure to stock your kitchen with the following:

Parchment paper – Because after I master the crust of a whole pie, the “pie but not pie” recipes is where it’s at.  Handpies, pie on a stick, mini pies, pie pockets… many of which need to go on a baking sheet with parchment paper.

Wax paper – Many people suggest using wax paper to roll out dough.  I’m not completely sold on this (it slips all around on my counter!), but get some just in case.

Pastry brush – Get two of them.  Regardless of what shape the pie takes on, they will be brushed with milk or an egg wash and a brush will ensure that you don’t over-moisten the dough.

Next up… tricks of the trade 102!

Drunk on Pie

10 Sep

Pie Eyed:  adj  slang  Intoxicated; drunk

I’ve had pie on my mind since last Thanksgiving.  Well, I have pie on my mind every Thanksgiving, but this time I couldn’t shake it.  Maybe it was because we hosted Thanksgiving at our house for the first time.  Or because I had finally graduated from babies and toddlers to preschoolers and had room in my brain to think about pie.  Regardless, November of 2010 brought a pie revolution to our home.

I made a homemade crust for the first time.  I piloted three different pumpkin pie recipes and two pecan pie recipes – the pie to person ratio was embarrassing.  The pie was good (pumpkin pie winner was Dorie Greenspan’s Caramel Pumpkin Pie) but I knew I could do better.

Spring came around and the mere sight of rhubarb and strawberries sent me on a pie binge – I made 8 over the course of two months.  The last two FINALLY had the right kind of crust.  The guy at the farmer’s market came to know the crazy look in my eye as I showed up every week hunting down the rhubarb haul.

But making big, round pies started to wear on me.  Sometimes you just want a little bit of  pie – not 8 slices that need to be eaten quickly before it goes bad.  And if you’re on a pie bend like me, then you definitely don’t want whole pies hanging around the house every week.  So I began obsessing about ways to keep the integrity of pie, but not make “pie” if you know what I mean.  Of course, this does not excuse beautiful whole pies from my baking endeavors – I’m just spicing it up a little to find all the wonderful ways to eat pie.

We’re a little drunk on pie over here.  If you find yourself wanting to raise a glass to pie, then join me as I find my way through failed crust attempts, filling mishaps and hopefully amazing accomplishments.  We can learn together and hope that everyone at our tables will be a little Pie Eyed this Thanksgiving!