Archive | Pie recipes RSS feed for this section

Oh My, Sweet Potato Pie

20 Nov

According to me, you get total pie street credit if you’re from the South.  If you have an accent and hail from any of the states below Ohio, I automatically assume that you are harboring your Great Grandma’s family pie recipe and that you know some worldly secrets about great pie making.  After all, don’t you Southerners learn to make pie just after you learn to pour yourself a bowl of cereal?  But alas, this is just a dream as I have never been to the Deep South and therefore never had the chance to taste what real southern pie is all about.

Like the saying goes, if you can’t go South, go to Whole Foods!  I have never tasted sweet potato pie and have always been drawn to the sheer comfort of the idea.  With Greater Cleveland being slim on the pickings for pie, I figured Whole Foods was my best bet for one that would at least be close to the real thing.  And there they were!  Displayed with a photograph of a lovely employee whose recipe was so good that Whole Foods adopted it for their stores in the Midwest.  Jackpot!  I enjoyed this sweet potato pie, but the crust was very soft and mushy making the dish taste more like pudding – no texture combination of the snap of a crisp crust followed by the smooth, creamy filling.  So once again, I set out to do better.  And I did.  This pie puts the OH! in sweet potato.

Sweet Potato Pie

Ingredients

1 recipe pie dough of choice for a 9 inch crust (I use Best of Both Worlds)

2 cups mashed sweet potatoes (about 2-3)

4T butter, softened

2 eggs

1/2 cup brown sugar

1/2 cup granulated sugar

1/2 cup milk

1T flour

1 teaspoon vanilla

1/2 teaspoon salt

1/2 teaspoon cinnamon

1/2 teaspoon nutmeg

1/4 teaspoon vanilla powder (optional if you don’t have any)

1/4 teaspoon baking soda

Directions

Ahead of time:  make dough and refrigerate for at least 1 hour or up to two days

Roll dough into a 13 inch circle and place into a 9 inch pie plate.  You will want to leave a one-inch over hang by cutting the dough to even it out.  Tuck edges under and sculpt an upstanding ridge if desired.

Refrigerate the crust for at least 15 minutes while you preheat the oven to 400.

Partially bake the crust and cool completely.  For details on blind baking a crust, see this caramel pumpkin pie post.

While crust is cooling, reduce oven temperature to 350.

Using a fork, poke holes into uncooked sweet potatoes.  Wrap potatoes in a dish cloth and microwave for 10-12 minutes until soft.  The skin will peel right off!

In a large bowl, whip together sweet potatoes and butter using a hand held or stand mixer.  Once smooth, add eggs one at a time until fully incorporated.  Add sugars, flour, salt, baking soda, vanilla, cinnamon and nutmeg.  With mixer on low, add milk and mix until blended.

Pour contents into pie shell and bake at 350 for 45-50 minutes or until the middle is set and a fork comes out clean.  Enjoy with some fresh whipped cream!

Caramel Pecan Handpies

6 Nov

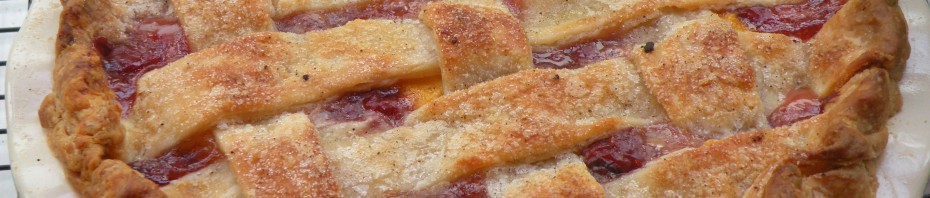
I don’t have a lot of enthusiasm in my heart for the other big “P” of the Thanksgiving table.  Pecan pie.  I’ve always put it into the category of Stuff My Dad Eats: Pickled beets, spinach with vinegar, chicken livers, cole slaw… food that I’m convinced takes a heavy dose of testosterone to palate.  I usually put it in the corner with the other marginal food, and leave it to be eaten by the grown men.

But this year I’m having a change of heart.  It’s not you dear pecan, it’s that Karo Syrup you insist on hanging out with.  Why are you so intent on burying your best qualities  in a sea of gelatinous, sugary mess?  Can’t you get some new friends like caramel, chocolate and espresso?  Yes he can. And oh yes, I did.

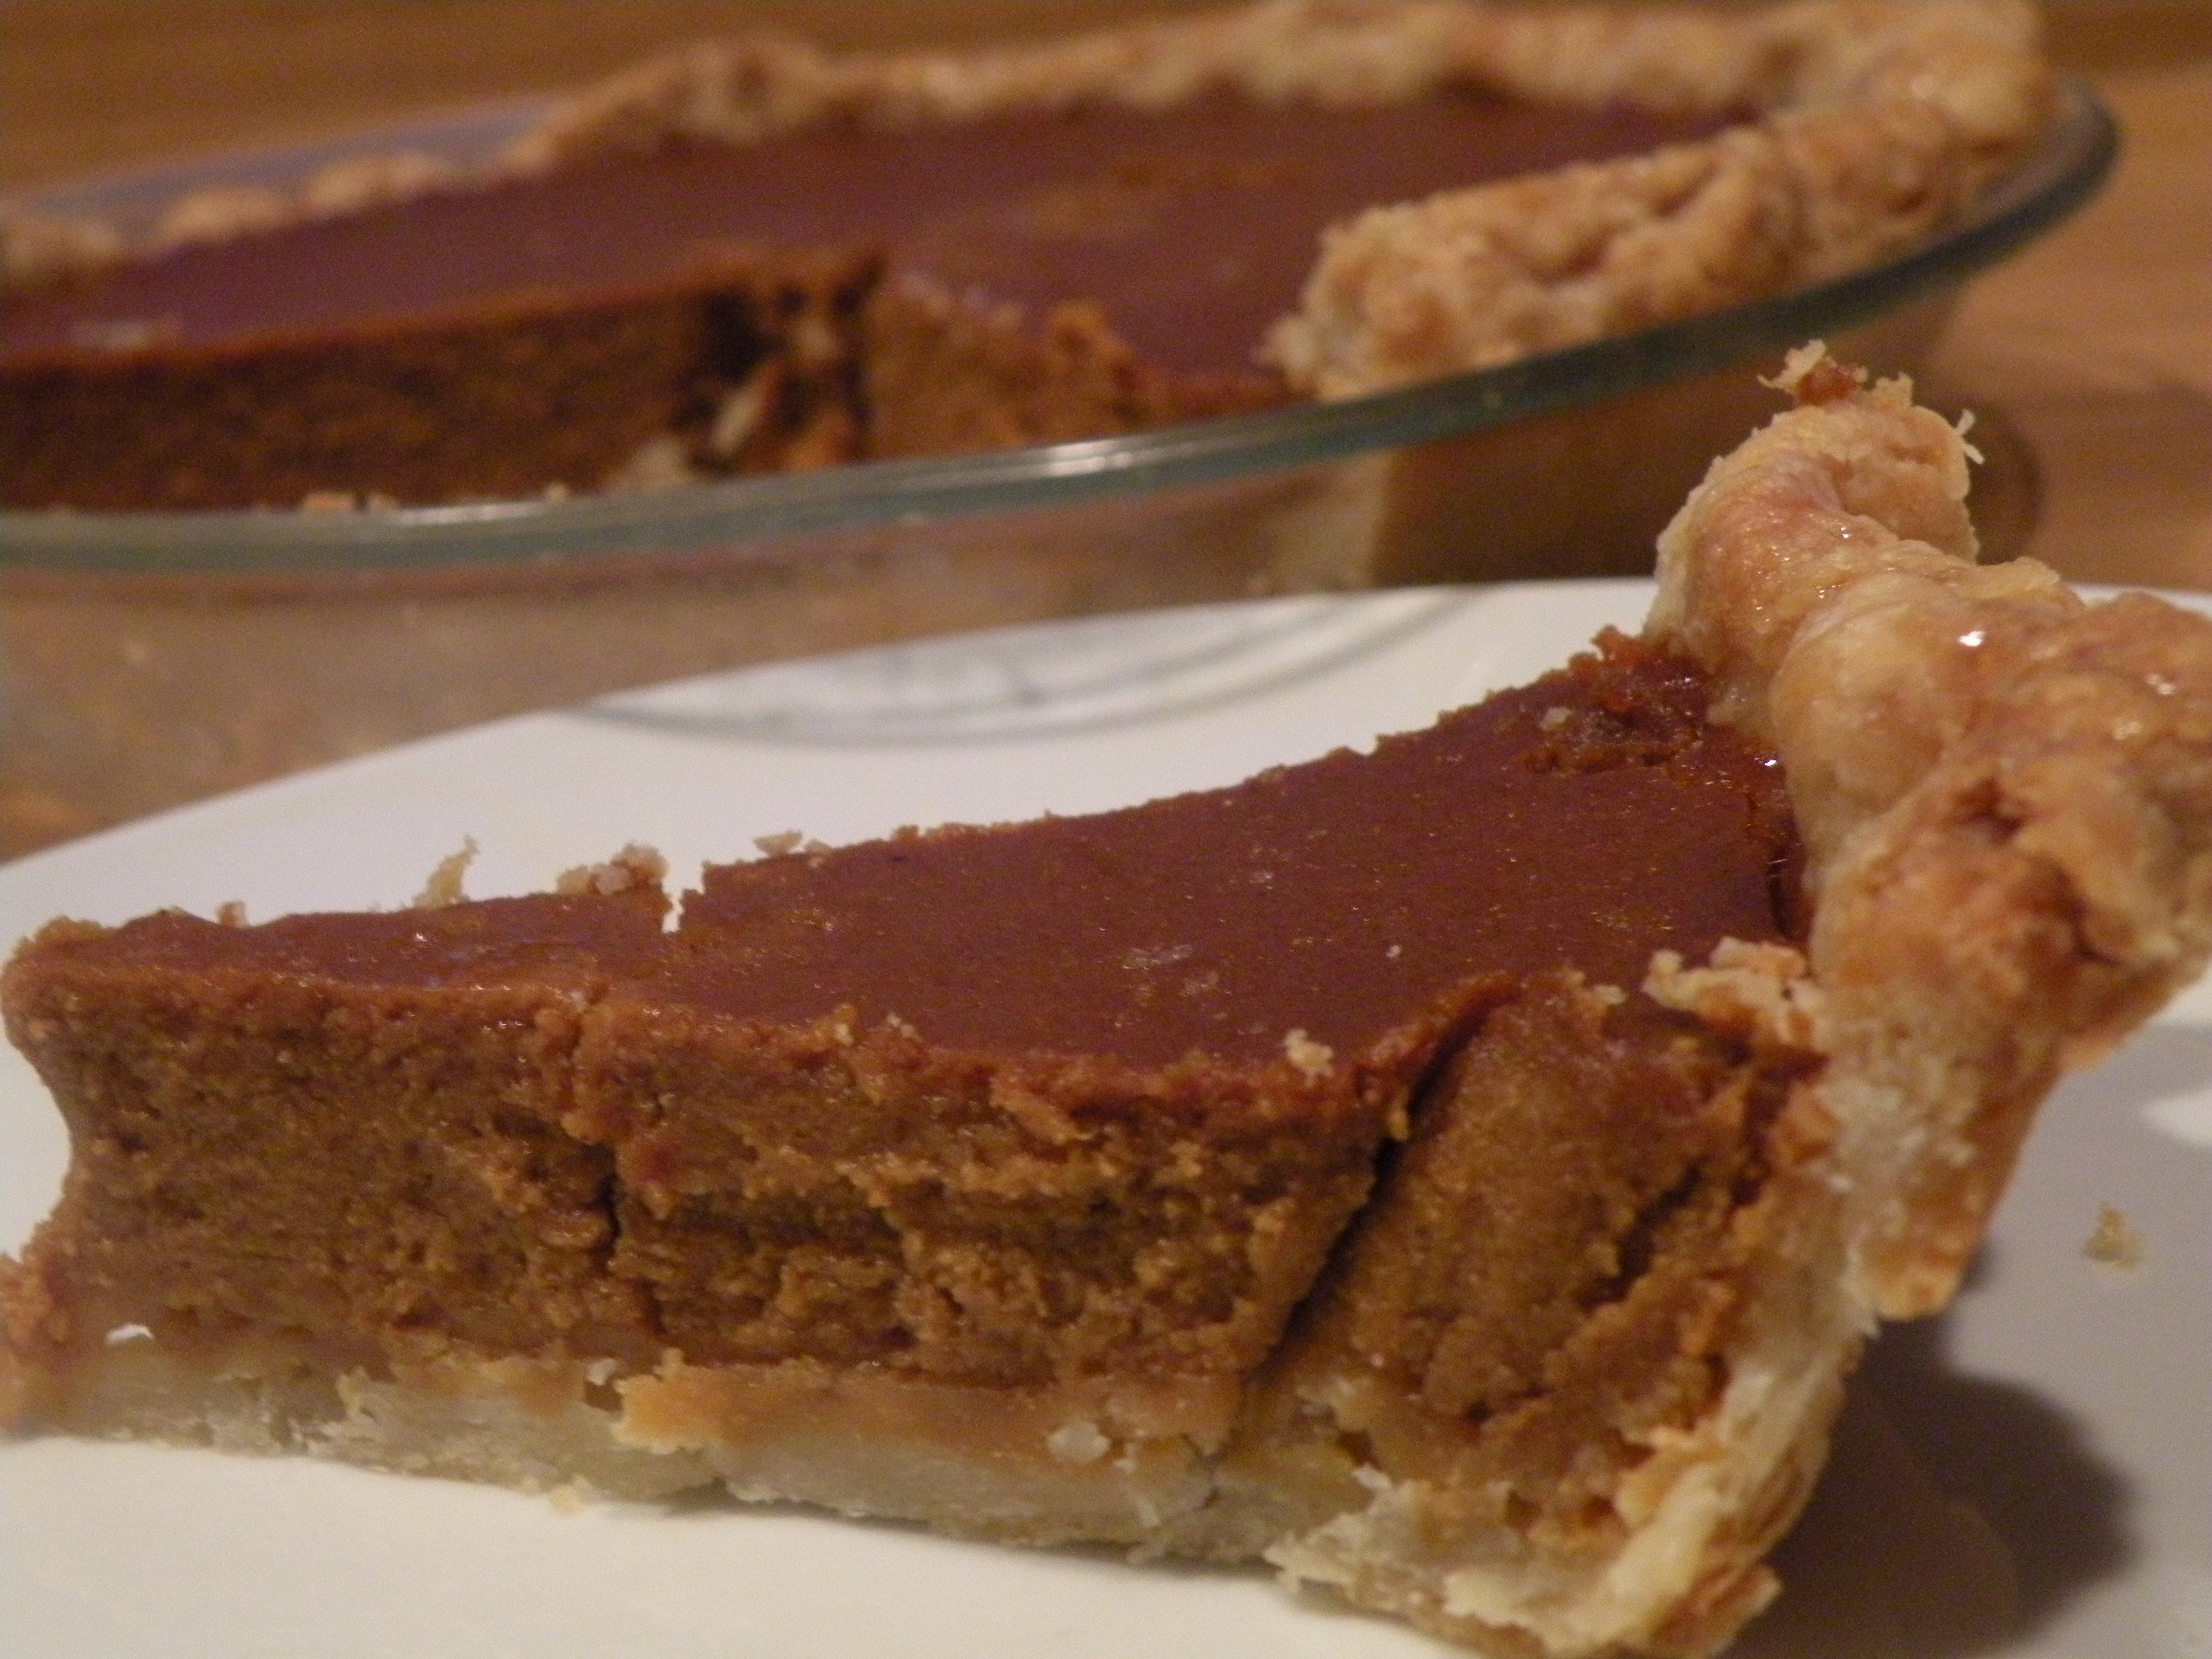
Enter Caramel Pecan Hand Pies.  I was inspired to try these by an article in this month’s Food and Wine magazine.  They scoured the country for Fall’s best pies and one of the features was a Caramel Pecan Hand Pie from Seattle’s High 5 Pie shop.  Like the pumpkin pie recipe from last week, the addition of homemade caramel made me think twice, and the crust to filling ratio of a hand pie was much better than the overload of pecan filling in a pie.

But, the recipe sill seemed to rely too much on corn syrup, so I made some adjustments including infusing a little Dorie Greenspan and adding some bittersweet chocolate, espresso powder and subbing brown sugar for the corn syrup.  The results?  This is not your Father’s pecan pie!  You MUST try this – they are worth the time and will blow your mind!

Caramel Pecan Hand Pies (adapted from High 5 Pie)

All butter pastry crust

4 cups all purpose flour (cold!)

2 teaspoons salt

4 teaspoons sugar

4 sticks unsalted butter cut into cubes (frozen)

3/4 cup ice water

If you have a 12-cup food processor, you can do this recipe all at once.  If you’re like me and have a smaller one, then you will need to half it and make two smaller recipes of dough.

Place dry ingredients into food processor and pulse a few times to distribute the salt and sugar.  Scatter frozen cubes of butter on top of the flour.

I slice the entire stick into fours and then cube it

Pulse in processor for about 1 second each time until the mixture looks like coarse meal.  You can take a knife and fluff it around to be sure no large chunks are under the blade.  This should be about 7-9 pulses.  I learned the hard way that you need to be sure the butter is small – you want flecks, but not large chunks or you’ll have a pool of butter on the baking sheet.  Once the butter is cut in, add the ice water through the chute about a tablespoon at a time while you continue short pulses.  The mixture will not look like cookie dough – it will probably look a little crumbly.  Periodically check to see if the dough pinches together.  When the dough begins to hold together, turn it out onto saran wrap, form into a ball, wrap and press it into a disc.  If you did one large batch, separate the dough into two discs.  Refrigerate for an hour or up to two days.

Filling

1 1/2 cups pecans (6 oz)

1 cup sugar

1/2 cup water

5 Tablespoons unsalted butter

1/2 cup half and half

2 teaspoons pure vanilla extract

3 ounces bittersweet chocolate

2 teaspoons instant espresso powder

Salt

3/4 cup brown sugar

4 large eggs

Preheat the oven to 375. Toast pecans on a baking sheet for 8 minutes until brown and fragrant.  Coarsely chop them (not too fine – chunks are good).

Make your caramel.  In a medium saucepan over medium-high heat, place one cup of sugar and 1/2 cup water.  Cook on the stove until is begins to thicken and caramelize.  When the mixture begins to turn color, swirl it occasionally and stand guard until it is a light to medium amber color.

Just starting to thicken and color - needs a little longer

CAUTION – this step is easy to mess up.  I did and had to start over.

When the caramel has reached the right color, reduce the heat to low and add the butter while whisking.  As soon as the butter is incorporated, add the half and half a little bit at a time, then 1 teaspoon of the vanilla and a pinch of salt.  Whisk until smooth.  Remove from heat and pour 1 cup of the caramel and set the rest aside.

OOPS. Removed from heat and added it to the half and half and butter all at once.

Second try. Much better - a creamy caramel sauce.

Let the sauce cool for a few minutes and then add the chocolate, espresso powder, brown sugar, corn syrup and remaining 1 teaspoon vanilla.  Once incorporated, add the eggs and whisk until smooth.  Fold in pecans and a pinch of salt.

Coat a 9 x 13 baking pan with non-stick spray.  Spread the pecan mixture into the pan and bake at 375 for about 25 minutes or until puffed and set.  Gently stir to recombine and pour in additional caramel sauce. Cool completely in the refrigerator.

Looks like my Grandma's date pudding

While the filling is cooling, remove dough from fridge and let rest for about 5 minutes.  On a lightly floured surface, roll out the dough as you would for a pie – about 1/8 inch thick.  Using a 5 inch round cutter (can, glass…), cut circles and place on parchment lined baking sheets.  Return to the refrigerator until filling is cool.

Assembly

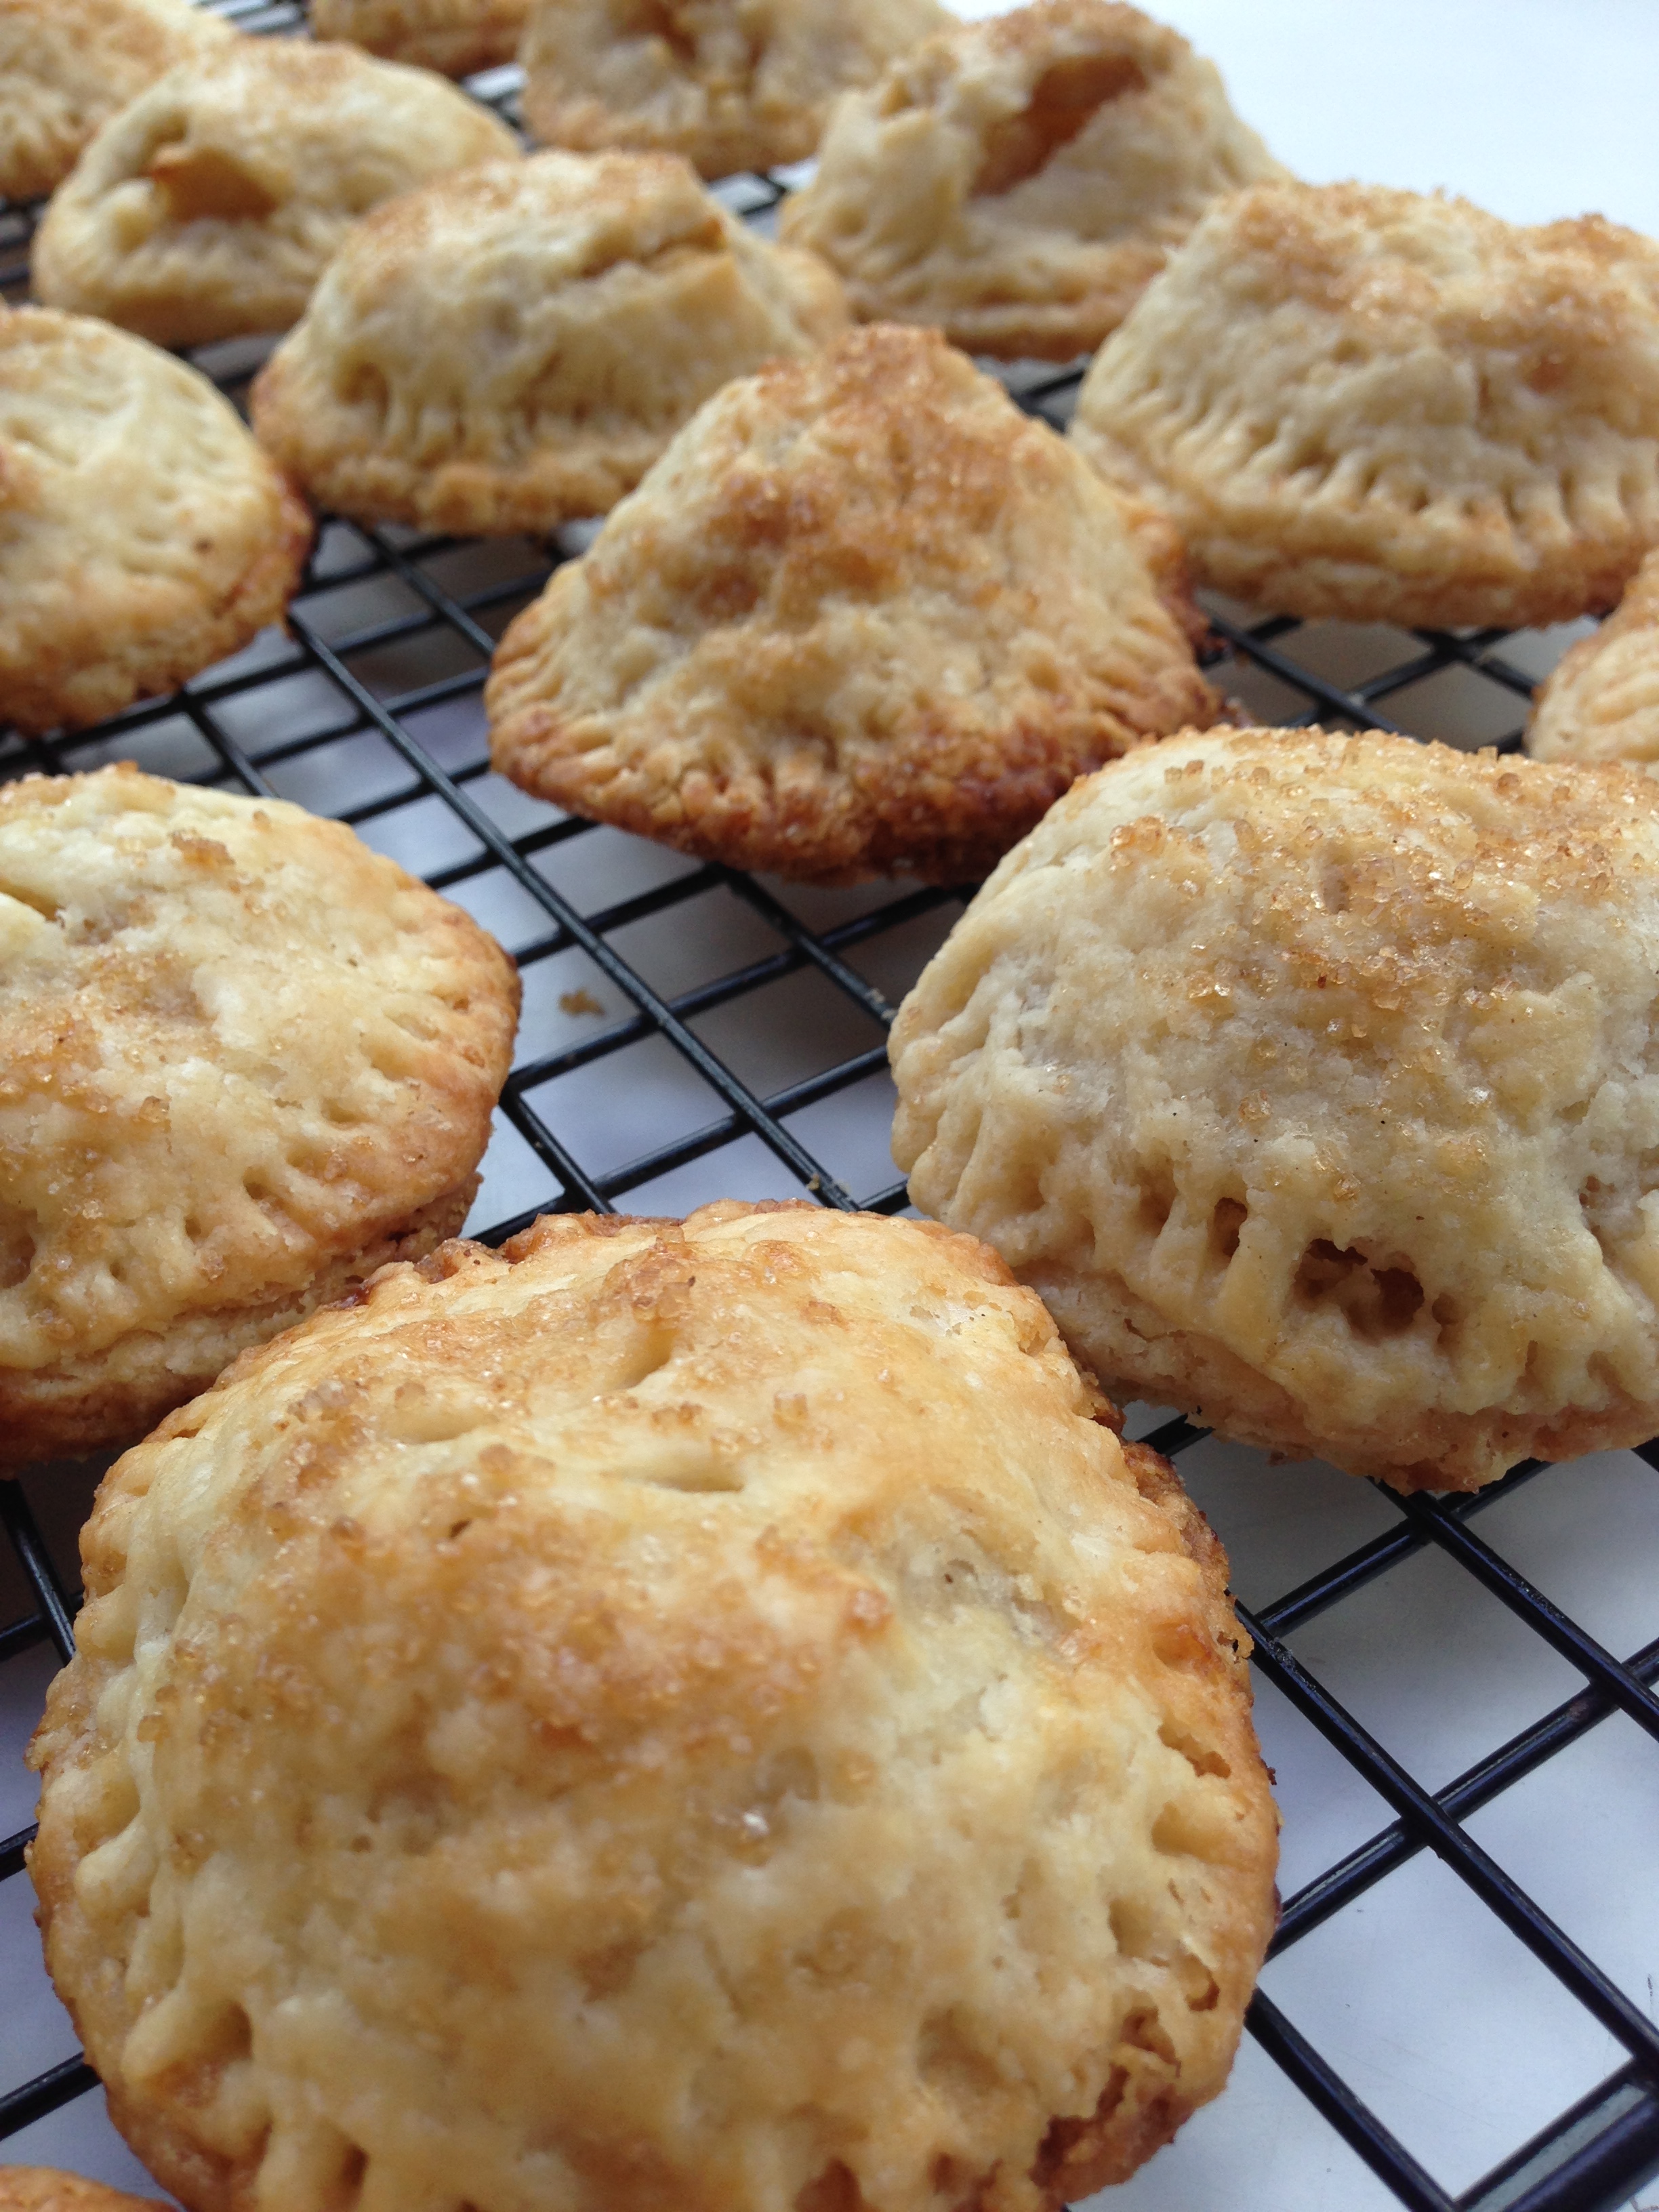
Remove dough circles from fridge and lightly brush with a beaten egg.  Place about 2-3T of filling in the middle of each circle.  Experiment to see how much you can put in without a disaster.  Fold the circle in half and seal edges with the tines of a fork.  Place in the freezer while you do the other tray.  When both trays have been filled and chilled again, lightly brush each hand pie with beaten egg.  Cut a slit in each one to vent and sprinkle with turbinado sugar.

Bake for 35-40 minutes or until golden brown in the middle and lower third of the oven.  Rotate baking sheets half way through.  Cool on a wire rack.

Enjoy warm with a cup of coffee.  Will keep in the refrigerator for three days and you can warm before eating.

No one puts baby in a corner anymore!

Caramel Pumpkin Pie

31 Oct

IMG_7858

There is a distinct rank and file to my Thanksgiving table:

1. Pumpkin Pie

2.  Pumpkin Pie

3. Oyster dressing

4. Turkey

Nothing upstages pumpkin pie in my book.  About three weeks before Thanksgiving, I find myself drawn to every magazine at the grocery store.  “Your best Thanksgiving Ever!” (Yes!)  “A Pumpkin Pie to Wow Them!” (Of course!) “The Best of the Best Pie Recipes for Your Table!” (This is the one!).  And every year I set out to find the best pumpkin pie recipe – one that people will talk about for years to come.  It never fails, the chosen recipe tastes like, well…pumpkin pie.  I was starting to feel like Linus waiting for the Great Pumpkin to come, each year hoping that the recipe Gods would pick me as the most sincere baker of all.  That is until last year when Dorie Greenspan and her Caramel Pumpkin Pie entered my life.

If you own only one baking cookbook, I say it should be Baking: From My Home to Yours by Dorie Greenspan.  She’s the author of Baking With Julia (yes, Julia Child) and knows her stuff.  Her technique of caramelizing a portion of the sugar before adding it to the pumpkin mixture gives this pie a depth of flavor that will knock your socks off.  It’s like a pumpkin pie has hit puberty – that soft, sweet, creamy pastry grows up to be a deeper, darker, more mature dessert that means business.  If you’re like me and always looking for that next best thing – this is your year!!  Continue reading

Strawberry Rhubarb Pie Bites

17 Oct

My parents came to town this weekend, so I wanted to knock their socks off with all this pie I’ve been ranting about (plus, if we’re being honest here,  I knew they would play with the boys and I could bake!).  I planned a pie-a-palooza of a weekend – dough experiments, mini pies, whole pies.

Staring out my kitchen window at the soggy leaves and rainy sky, I wanted just one more taste of warm weather before the winter suffocated me in the northeast Ohio snowbelt.  I knew I had the perfect solution to both a flavor my parents would love and one that would lift my spirits – strawberry rhubarb!  Lucky me, I had the last of the farmer’s market rhubarb frozen in my freezer along side some strawberries.

I had done a trial run a while back, so I set out to perfect my recipe.  I ended up crafting my own filling recipe from a hybrid of Smitten Kitchen and my Hungarian Grandmother’s.  The result: pure spring in every bite!  Love, love, love.

Continue reading

Mini Apple Pie Bites

2 Oct

IMG_3559 copy

I’m feeling the consequences of too much pie.  I think I am honestly hung over.  It is not news that pie crust is nowhere near healthy – I’m not even going to try to claim the calcium from butter.  Ian and I have been eating an average of one mini-pie a day…for the past month.  We’re like a pair of bears getting ready for the winter hibernation.  I thought the 17 Day Diet was the solution – I would start today, detox, and find the strength to make pie and not eat it.  Then Ian suggested that we should just make ourselves sick on pie, then we would no longer want it.  So, with a sigh, I brewed some coffee and had a pumpkin mini-pie for breakfast.

I couldn’t let fall pass me by without working on an apple mini-pie.  There’s just something about a local apple – I could eat one for every meal.  So, this week I embarked on experimenting, eating, and more experimenting.

I used the apple pie filling recipe that I posted earlier, but made some tweaks and figured out how to pre-cook it without turning it mushy.  Then, instead of glazing like the pumpkin, I sprinkled them with sanding sugar.

Unlike a regular apple pie, the apples need to be cut pretty small to pile into the  middle of the little circle.  They are even a little big in the picture below.

Continue reading

Pumpkin Pie Bites

26 Sep

* Update – I made these hand pies again and used a 2 1/2 inch diameter glass to make them a little smaller.  This allowed me to get a dozen from 1 recipe of dough and the serving is a little smaller (which means less calories!).

Fall has me feeling like pie (shock, so did spring and summer).  My son Elliot has been reminding me all weekend that it is officially Fall and wondering when we can have our first pumpkin pie.  I have this weird issue about having pumpkin pie before Thanksgiving.  It’s my absolute favorite pie, but I just can’t bring myself to make one if there isn’t turkey on the table.  I’m all over anything else that has pumpkin in it – lattes, cookies, bread, pasta – the seasonal eater in me is at her best in the Fall.

With pumpkin in the air and pie on my mind, what’s a girl to do?  It’s time to go back to pie-that-isn’t-pie… pumpkin style!

Hand pies – practice makes perfect

When I first started this quest a couple of months ago, I dove right into perfecting the hand pie.  They’re such a throw back and with a vanilla glaze, are reminiscent of the Hostess pies I used to eat as a kid.  That is, if you make them right.  After eleven – yep – ELEVEN attempts, I finally nailed it tonight on my twelfth attempt at perfect hand pies.  Here are my lessons learned from the many failed attempts:

All butter isn’t all it’s cracked up to be

I so want to be a believer of all butter crust, but it just has not worked for me with hand pies.  Every time I tried, my dainty little pies ended up cooking in a pool of butter on parchment paper.  The result was a chewy, inedible crust and a total waste of good filling.  So I went out and bought a store bought crust just to see what would happen.  Do you know what happened?  The most beautiful little hand pies, all crisp, brown and flaky.  Why, you ask?  All LARD.  LARD – the homecoming queen of pie crust.  So, I experimented and found that if I increased the shortening, my crust was much better.

Cold, cold and colder

These hand pies are not for the faint of heart or short on time.  They take a serious commitment and some preparation.  To make a hand pie, take the dough out of the fridge and roll it as if you were rolling a pie and just as thin.  Using a round cookie cutter (anywhere from 3 to 5 inches in diameter depending on the finished size you want), cut circles and gently place them onto a baking sheet lined with parchment paper.  If you have scraps and need to re-roll them to get more circles, wrap them back up into a disc, cover with plastic wrap in chill in in the fridge for 10 minutes.  Once you have cut all of your circles, place them back in the fridge while you make your filling.  Once your filling is ready, take the circles out of the fridge and fill your hand pie (instructions to come).  Once the pies are sealed and filled, put them back in the fridge (or freezer) for 10-15 minutes.  Then, you’re ready to bake them.  If you didn’t notice, there’s a lot of fridge time!  It’s totally worth it.

Filling is key

I made a mistake early on by making pie filling and putting it uncooked into the hand pies as I would a regular pie.  This resulted in an inside crust that seemed under baked.  I realized that you need to fully cook your fillings and then bring them to room temperature before filling a hand pie.  Once I began to precook my fillings, the pies baked so much better!

Continue reading

Apple Crumb Pie

15 Sep

Enough about all of the books, blogs and articles that espouse how to make great pie.  It’s time to put my hands in the bowl and get dirty.

Over the past month or so, I’ve made ten attempts at various incarnations of a pie crust (attempt number eleven is in the fridge as I type).  I’ve landed on a pie crust recipe that is a hybrid of a few that I’ve had success with.  There’s not much creativity in tweaking a pie crust recipe, but this one seems to have the right shortening to butter ratio for my taste.

Best of Both Worlds Pie Dough

For a 9-inch single crust

1 1/2 cups all purpose flour (Cold!)

1 Tablespoon sugar

1 tsp salt

4 Tablespoons (a little more than 1/3 cup) shortening (I like Spectrum palm oil shortening) (Cold!)

8 Tablespoons unsalted butter (Cold!)

* cut both of these into tablespoon-sized pieces

Just under 1/4 cup ice water

1 1/2 teaspoons cider vinegar (just add to the water)

Put the flour, salt and sugar into a food processor with a metal blade; pulse just to combine the ingredients.  Drop in the butter and shortening.  Pulse only until they are cut into the flour – don’t over process.  It will look like some are the size of peas and some pieces might be larger.  Gradually begin to add the water through the chute pulsing each time.  Add about a tablespoon at a time. Watch carefully – you want to stop as soon as the dough can be pinched together.  This will happen in the blink of an eye.  The dough will not form in the processor like you would expect cookie dough to.  It might even still look a little crumbly.  If you can pinch it, turn it out onto saran wrap and form it gently into a ball.  Wrap the dough, flatten into a disk and refrigerate for at least an hour.

In future attempts, I’m going to try a vodka twist and one that includes an egg just to spice things up.

It was all about apple pie this weekend.  I mean, you can’t be a pie maker (or an American so I hear) if you can’t make an apple pie.  Continue reading